Water Injection
What is Water Injection?
See my What is Water Injection article
Before I start what considerations are there?
- Where to put the water reservoir
- Minimise the run between the reservoir and pump
- Try and mount the pump below the water level in the reservoir. This will ensure the pump is always primed
- How to get power to the pump relay
- How to power the relay once the car is started i.e. a +ve once the car is started
- Where to put the pressure switch
- Where to run the pipe work to feed the pump from the reservoir and the pump to the nozzle
- Where to put the nozzle
- How to mount the nozzle
How did you install it?
Things that need to be done before mounting your kit the same way as this...
- Battery relocated to the boot - article
- Fuel pump relay mod, and remove the dropping resistor -
article
- Remove the
EGR system - picture
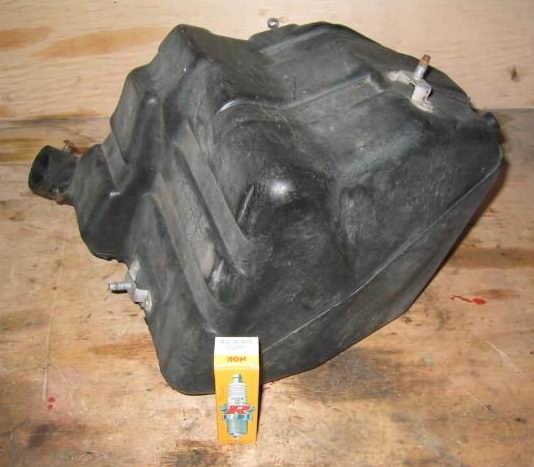
- Remove the intake resonator from within the front left wing
 |
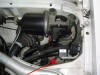
I started by finding a good position to mount the pump. I mounted it against the right hand side inner
wing. This is an excellent position. Firstly I removed the carbon canister and some of the mounting bracket. This left the correctly spaced
bolt holes for the pump! |
 |
Other advantages are that it is mounted lower than the water reservoir to prevent water starvation,
(shortening the pumps life), a heat sink (via the inner wing), out of the way and also removed from the greatest heat i.e. not near the exhaust or
manifold or at the top of the engine bay - too hot for me! |
 |
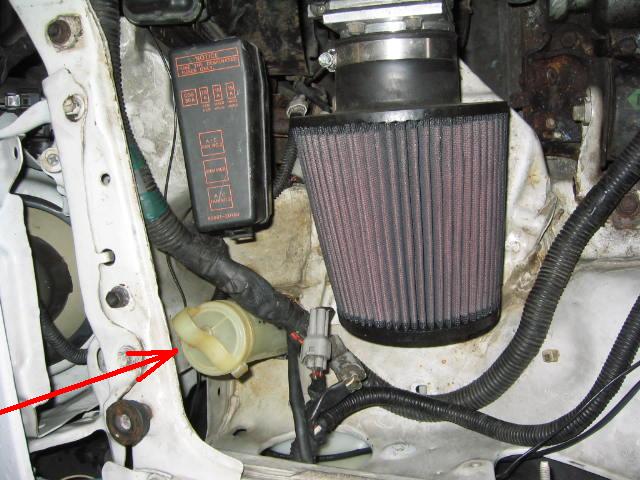
Next up is the water reservoir. I got a windscreen wiper bottle from another 165. Cut
a hole through the inner wing and fed up the bottle. The advantage of this is a large water reservoir - 5litres - ish, out of the way, in a cold
place, and very close to the pump. The pump should be as close as possible to the reservoir as it isn't made to "suck" water, it's made to push!
I applied some Araldite and stuff so that 1 of the holes was blocked and the other could seal the pipe for the water feed to the pump. In
order to mount the reservoir here you will need to remove all the crap in the inner wing i.e. the resonator -
picture. Also to mount this here you will need to relocate the battery to the boot. You
can use the existing windscreen wiper reservoir but I am not a fan of this method... |
 |
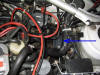
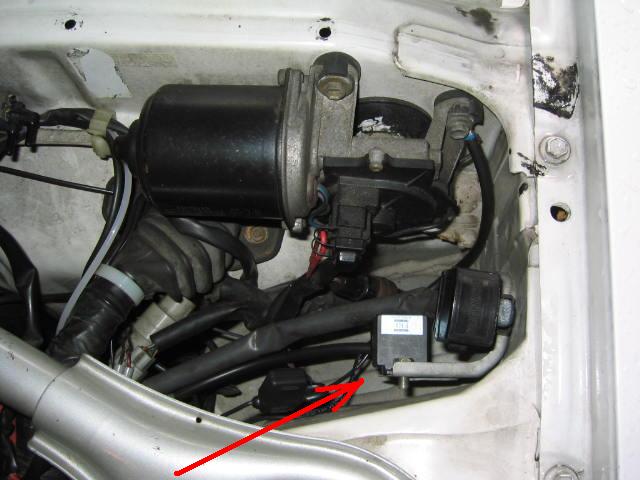
The pump requires a fair amount of power. In order to control this power a relay
needs to be installed. I fitted mine where the fuel pump resistor used to be. If you've relocated your battery then this is a brilliant place - out
of the way, secure and close to a point where you can easily tap into the battery. The wiring loom for the WI isn't particularly long and this point
is excellent to provide power to the pump and enough reach to the pressure switch. Relay indicated |
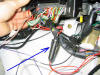 |
The switched ignition voltage can be picked up by pushing the wire through the big
rubber boot and down by the ECU.
I connected in a fuse into this line and have run several devices from it that require to be "told" when the ignition key is turned. The fuse is
arrowed |
 |
To mount the pressure activation switch I drilled and tapped a hole into a plate which covers the
EGR hole. You'll need to remove the EGR to mount the switch here |
|
The pipe was then run from the water reservoir to the pump, cable tied to the bottom of the inner wing |
 |
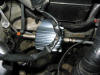
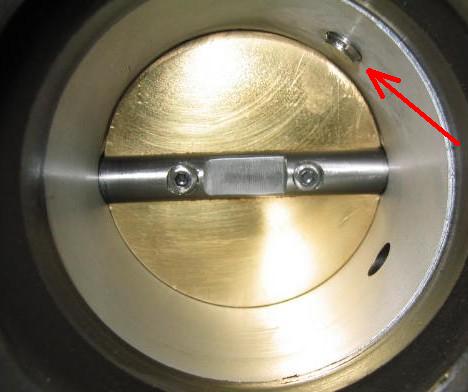
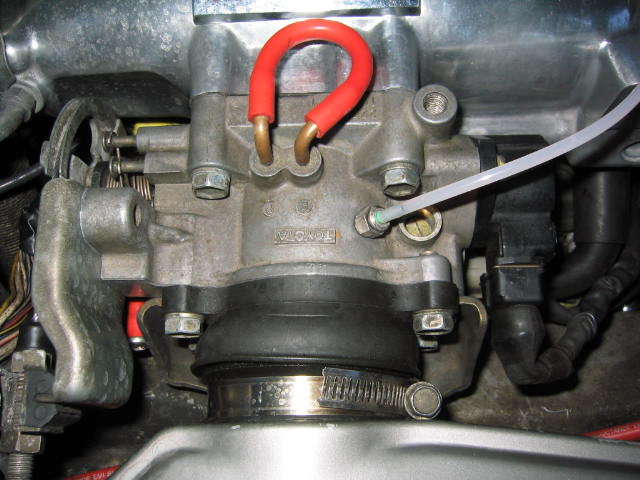
Next was the nozzle. Carefully drill and tap a hole into the throttle body. Before
drilling remove the
IC and check that the nozzle will clear the butterfly valve throughout it's maximum extent of travel. Screw in the nozzle - mine was 0.5mm but I
have recently bought a 0.4mm as I developed a bit of a misfire under boost with the WI activated |
 |
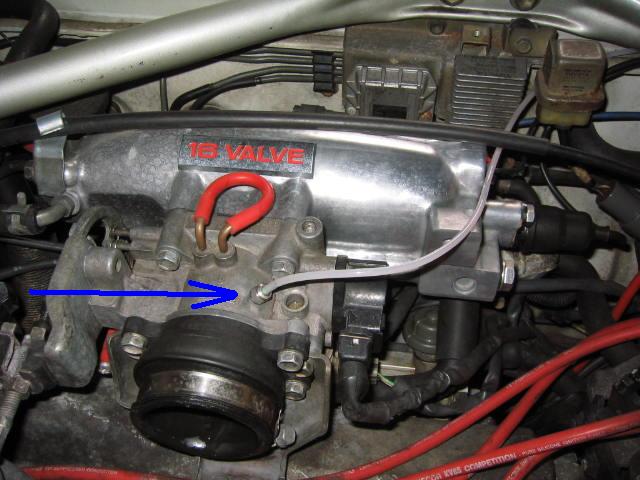
Run the pipe from the pump to the nozzle |
 |
Close up of the nozzle and pipe work |
If you have fitted the intake air temperature monitor then you will clearly see the system working. If you haven't then You'll just have to
drive the car and then check that water is arriving at the nozzle!
I set the cut in point to 12psi to ensure there was enough flow of air through the intake, this is easily set with the temp monitor, but setting
without this I would imagine to be a lot more awkward. Try using a multimeter to measure when the pump kicks in...
Anything else?
Don't run the pump dry. If you forget to top up the system and it does run dry then it'll make an horrible noise! To stop it coming in you can
always remove the fuse...
Allegedly the best position to mount WI on a
WTA
IC car is before the IC. However, I have found this not to be as effective. Locating this
after the IC is much better...
To increase the octane rating of your fuel, thus further preventing detonation,
you can add methanol to the water used for the water injection. Try your local model shop.
You might want to add a low water level indication, activation LED and/or a switch to turn off the WI from inside the car.
Adjustment of the ERL kit is by turning the pressure sensor screw. Clockwise increases the activation point. This is set to 10psi at the factory and appears
to be a pretty good level.
Disclaimer
This article was written as a handy guide as to how I installed my Water Injection. If you are in any doubt or not qualified then do not install this system. Always
consult a professional. Alterations away from the manufacturers specification is not recommended. Failure to install this system correctly may seriously damage
your engine/bank balance.
Back to top


