 |
 |
 |
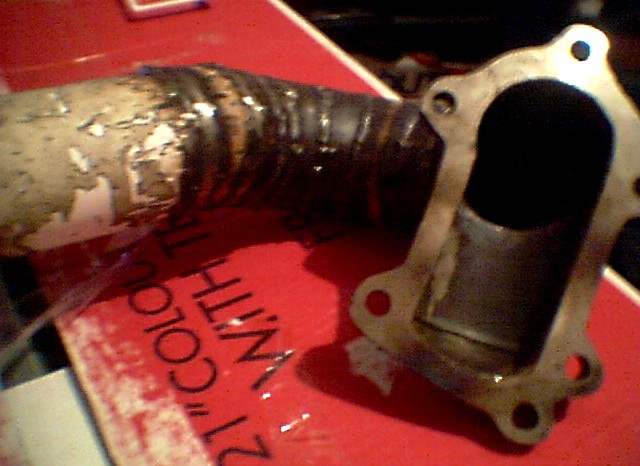 |
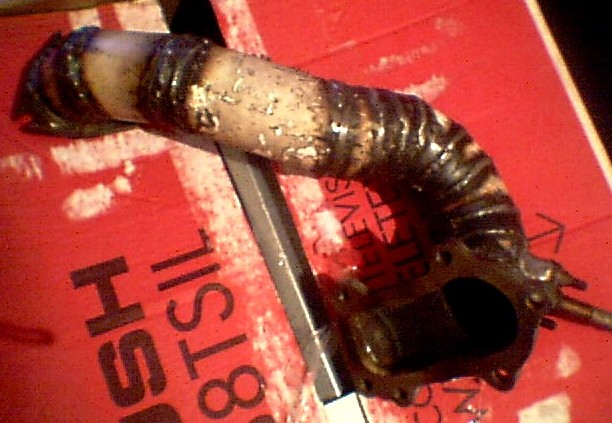
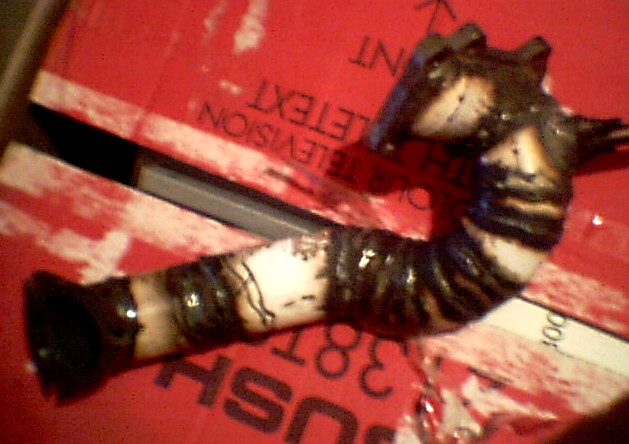
| Whole DP | Whole DP | Exhaust end | Turbo end |
 |
 |
||
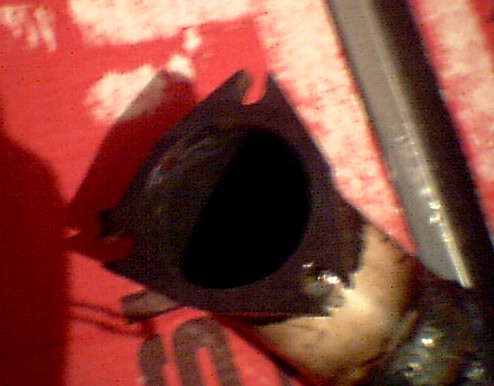
| Side view | Exhaust end | ||
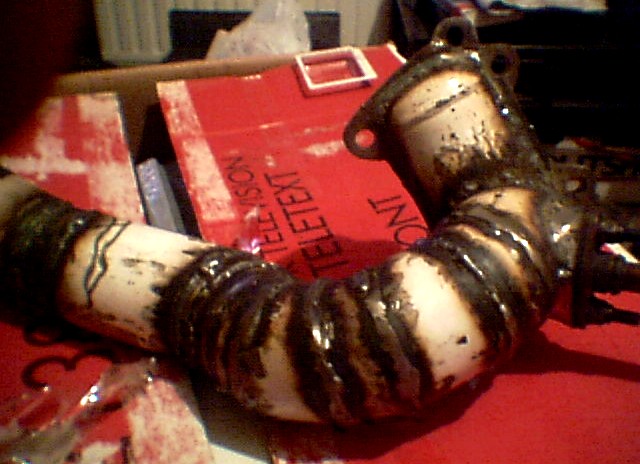
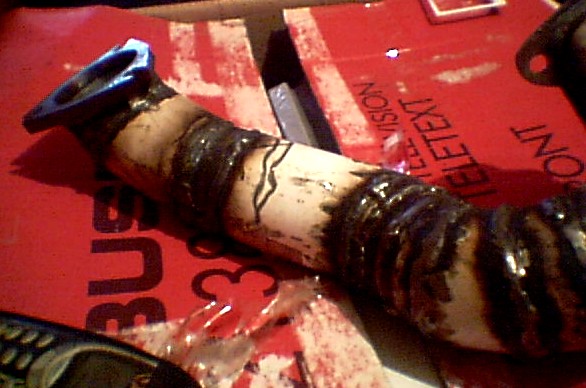
Homemade Downpipe
|
|
|
|
| Whole DP | Whole DP | Exhaust end | Turbo end |
|
|
||
| Side view | Exhaust end | ||
Instructions
To make the turbo to down pipe flange I used the gasket to get the shape marked out then took it to a metal working shop and got it cut out using oxy/acet cutting gear which was ok but couldn't get less than a quarter of an inch away from my marks, so when it eventually cooled off I stood there with a drill and some grinding bits for a couple of hours getting it right. then had to find a pillar drill for the bolt holes - I didn't use a jig!!!!!! but I did use some modelling clay to take a mould from the inside of the turbo end of the cat to be sure I didn't make the waste gate cover too shallow.
Knocking the pipe up was the fun part! I used a 4 inch angle grinder and a few different techniques to try and find the best way to mark and cut a straight line through the pipe until I remembered my "big daddy" grinder and found that a single chop is the best way and leaves the best finish which I ground flat on the side of a big disk in grinder held in my vice, then merrily then chopped up a bunch of segments at various angles between say 15 and 30 degrees.
The reason I decided to use the welding gas, (disposable and empty), bottles is due to their thickness almost 2mm which means I had a lot of play when twisting two oval cuts for a spiralling effect or a change in the direction of the bend. which meant that I could aim the parts as I went along, it did mean running out to the car a few times and checking progress, marking next joints and after a while I had to start from the other end until I had the final mating point which I had to measure angles and check that I had the two cuts in the right place to match a both ends this was probably the trickiest part once that was competed and tacked into position on the car" if you do this you should think about supporting the mid pipe in the position it normally be in with the cat in place"
When water tested I found a good few leaks; re-welded them then there was the template for the oxy sensor oh my god I had to make two because I thought it would be a good idea to cut the first one from a rotorvator blade, cutting it out was ok but do you think I could drill this metal, super tough gear must be high carbon steel so I wasted some time there ..so that's about the size of it!
The bottom connector I admit does look smallt hat's cos it came from another exhaust pipe that I scrounged from Kwik fit's scrap pile but once I drilled the hole to the correct size in the middle ..just about the size of the inner diameter of my pipe it was a perfect snug fit on the protruding part of the mid pipe which means that the midpipe flange is a shade under 3 inches in diameter also the gasket, (Ł2.80 from Mr T), slides snugly onto this protruding pipe ..so no paste needed at all
The only other thing I bought was a replacement turbo elbow metal gasket...Ł22.......not that you have to but mine was a bit corroded and cracking they are reusable I believe. One thing wrong with it is that I welded the oxy sensor at a shade two sharp of an angle and had to make a slight adjustment to the air intake on my alternator i.e. hit it a bit! (rather that chop it off and re-weld it cos by this time I needed a rest)
After thoughts
Because I had such a large first bend I had to cut my top bracket from the alternator to cat! I would say that it is a good idea to have this bracket on whilst building up the top part, (to get an idea of how far you can take the bend out without fowling the brace) . also after I had made mine I realised that had my turbo flange been a bit thinner I might have been able to fit it without removing the oil filter and cooler mind you I don't think the cat will come off of the studs with it on . I would say that a piece of 6mm plate would be ok just don't forget to build it out far enough for the waste gate to open and hope it doesn't warp whilst welding up...
Many thanks to Ian Gibson for this article. You can contact him here