 |
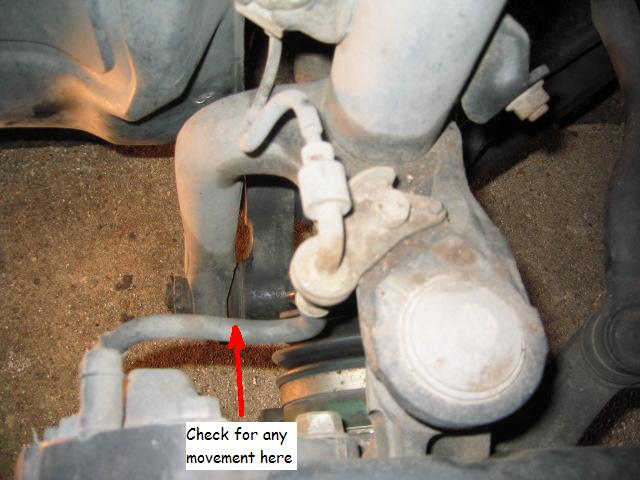 |
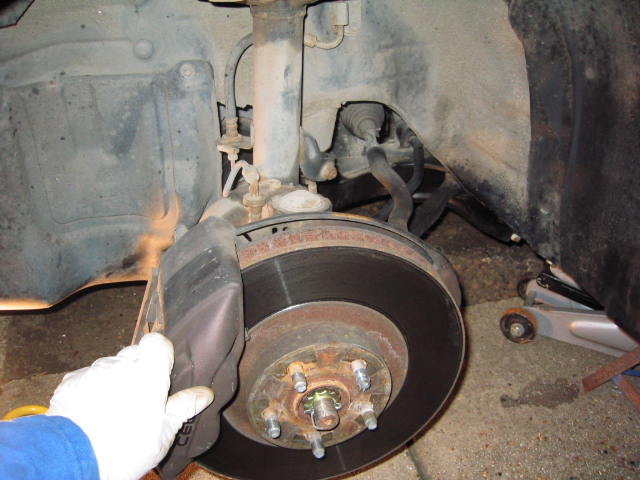
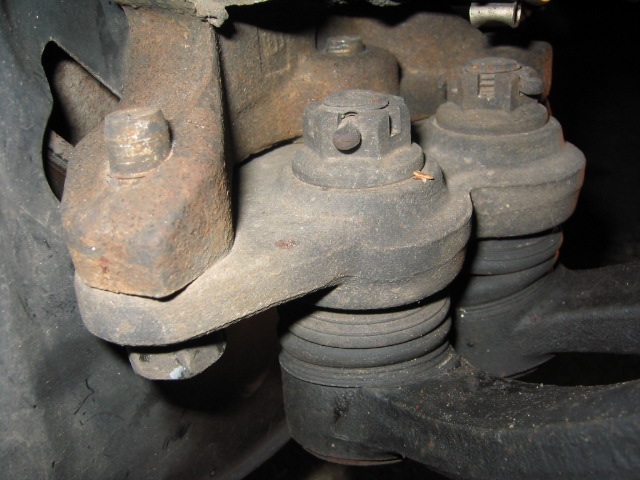
| Checking for wear. Arrow shows the direction to try and move calliper - there should be zero movement | When rocking the calliper inspect this area for any movement. If there is then strongly suspect the figure of 8 link |
Change 205 Super Strut Suspension
* This article is applicable to the 205 only - no other GT4 is fitted with Super Strut *
* This article details removal of the complete lower suspension for the Super Strut *
Why do I want to change my Super Strut (SS) suspension?After some miles, (normally 60k-80k), it seems that the Super Strut suspension gives up and wears out. This normally manifests itself as clonks, creaks, squeaks, knocks, groans from up the front of the car as well as vague and sometimes unpredictable handling.
How can I tell if it's the Super Strut that is knackered and not something else?
If the SS is knackered then there will most probably be play in the suspension components - probably, but not always. There are a couple of checks you can do to try and indicate the problem areas.
If these checks don't show anything obvious then you might also want to check the anti-roll bar bushes, the suspension springs, track rod ball joints, shock absorber top ball joints and the shock top mount as this has a bearing inside that wears, but it seems very rare for this to wear that badly.
How do I know if I have Super Strut?
Only the 205 GT4 is fitted with the SS. Other Toyotas also feature this suspension arrangement, such as some Gen 7 Celicas, Levin and the 202. The 202 lower arms etc is the same as the 205.
OK I'm up for some free checks, what do you have to do?!?
|
|
| Checking for wear. Arrow shows the direction to try and move calliper - there should be zero movement | When rocking the calliper inspect this area for any movement. If there is then strongly suspect the figure of 8 link |
What parts are there in the SS suspension?
Have a look here for some pictures and a description of each part.
Why is it so difficult to find the worn component?
There are several "joints" for the suspension. For each front wheel your have:
| Lower Arm 1 - "Banana Bar" | 1 x rubber type bush on the rear end against the chassis 1 x Ball joint attached to a plate on the bottom of the wheel hub |
| Lower Arm 2 - "Camber Control Arm" | 1 x spherical joint joining onto the lower cross member 1 x Ball joint providing a connection onto the figure of 8 1 x Ball joint attached to a plate on the bottom of the wheel hub |
| Figure 8 | 1 x Ball joint connecting onto the bottom of the shock absorber |
| Shock absorber | 1 x Ball joint connecting midway on the shock to the top of the wheel hub |
| Top mount | 1 x bearing within the rubber top mount allowing the whole suspension leg to twist when you move the steering wheel |
| Drop link | 1 x Ball joint connecting onto the anti-roll bar 1 x Ball joint connecting the other end of the drop link to the shock absorber |
The suspension is held together pretty tightly and just one dry/worn ball joint will moan like mad, maybe without obvious signs of movement.
What's the most common part to wear?
The figure of 8 seems to be the prime candidate for failure, and these can wear quite badly giving the majority of the problems. Opinions vary, but, I would always change the figure of 8 and the lower arm as both these components will probably have moved the same amount, but replacing the lower arm is a bit of a git of a job, and it adds to the expense considerably...you might want to chance just the replacement of the figure of 8.
Ok, what things you should know before
Parts to order
The shopping list will vary depending on how many parts you intend to change. The shopping list...
| No. | Part name | Toyota Part Name and Number | Toyota Cost | Blueprint | TCB Cost |
Whifbitz Cost |
Japparts Cost |
Notes |
| If you are only replacing the figure of 8's | ||||||||
| 2 |
Figure of 8 |
48066-20061 |
105.64 |
70.50 |
41.13 |
These are not handed |
||
| If you are replacing the figure of 8's and the lower arms | ||||||||
| 2 | Figure of 8 |
48066-20061 |
105.64 |
70.50 |
41.13 |
These are not handed |
||
| 1 | LH Camber Control Arm |
48606-29025 |
317.92 | ADT 38667C (See note 4) 274.70 |
235 |
193.88 | 195 inc delivery |
|
| 1 | RH Camber Control Arm | 48605-29025 Arm sub-assy, front suspension, lower No.1 RH |
317.92 | ADT 38666C (See note 4) 274.70 |
235 |
193.88 | 195 inc delivery |
|
| 2 | Banana Bar Bush | 90389-21003 Bush |
2.90 |
Require new as old bush will be cut during removal |
||||
| If you are replacing all the lower arms and figures of 8's | ||||||||
| 2 | Figure of 8 | 48066-20061 Arm-sub-assy, front suspension camber control RH |
105.64 | 70.50 | 41.13 |
These are not handed |
||
| 1 | LH Camber Control Arm | 48606-29025 Arm sub-assy, front suspension, lower No.1 LH |
317.92 | ADT 38667C (See note 4) 274.70 |
235 | 193.88 | 195 inc delivery |
|
| 1 | RH Camber Control Arm | 48605-29025 Arm sub-assy, front suspension, lower No.1 RH |
317.92 | ADT 38666C (See note 4) 274.70 |
235 | 193.88 | 195 inc delivery |
|
| 2 | Banana Bar Bush | 90389-21003 Bush |
2.90 |
Require new as old bush will be cut during removal |
||||
| 1 | LH banana bar | 48069-29195 Arm sub-assy front suspension, lower No.2 LH |
217.00 | ADT 38669C (See note 4) 181.40 |
152.75 | ? | ||
| 1 | RH banana bar | 48068-29195 Arm sub-assy front suspension, lower No.2 LH |
217.00 | ADT 38668C (See note 4) 181.40 |
152.75 | ? | ||
Torque specifications
All stated in Nm...
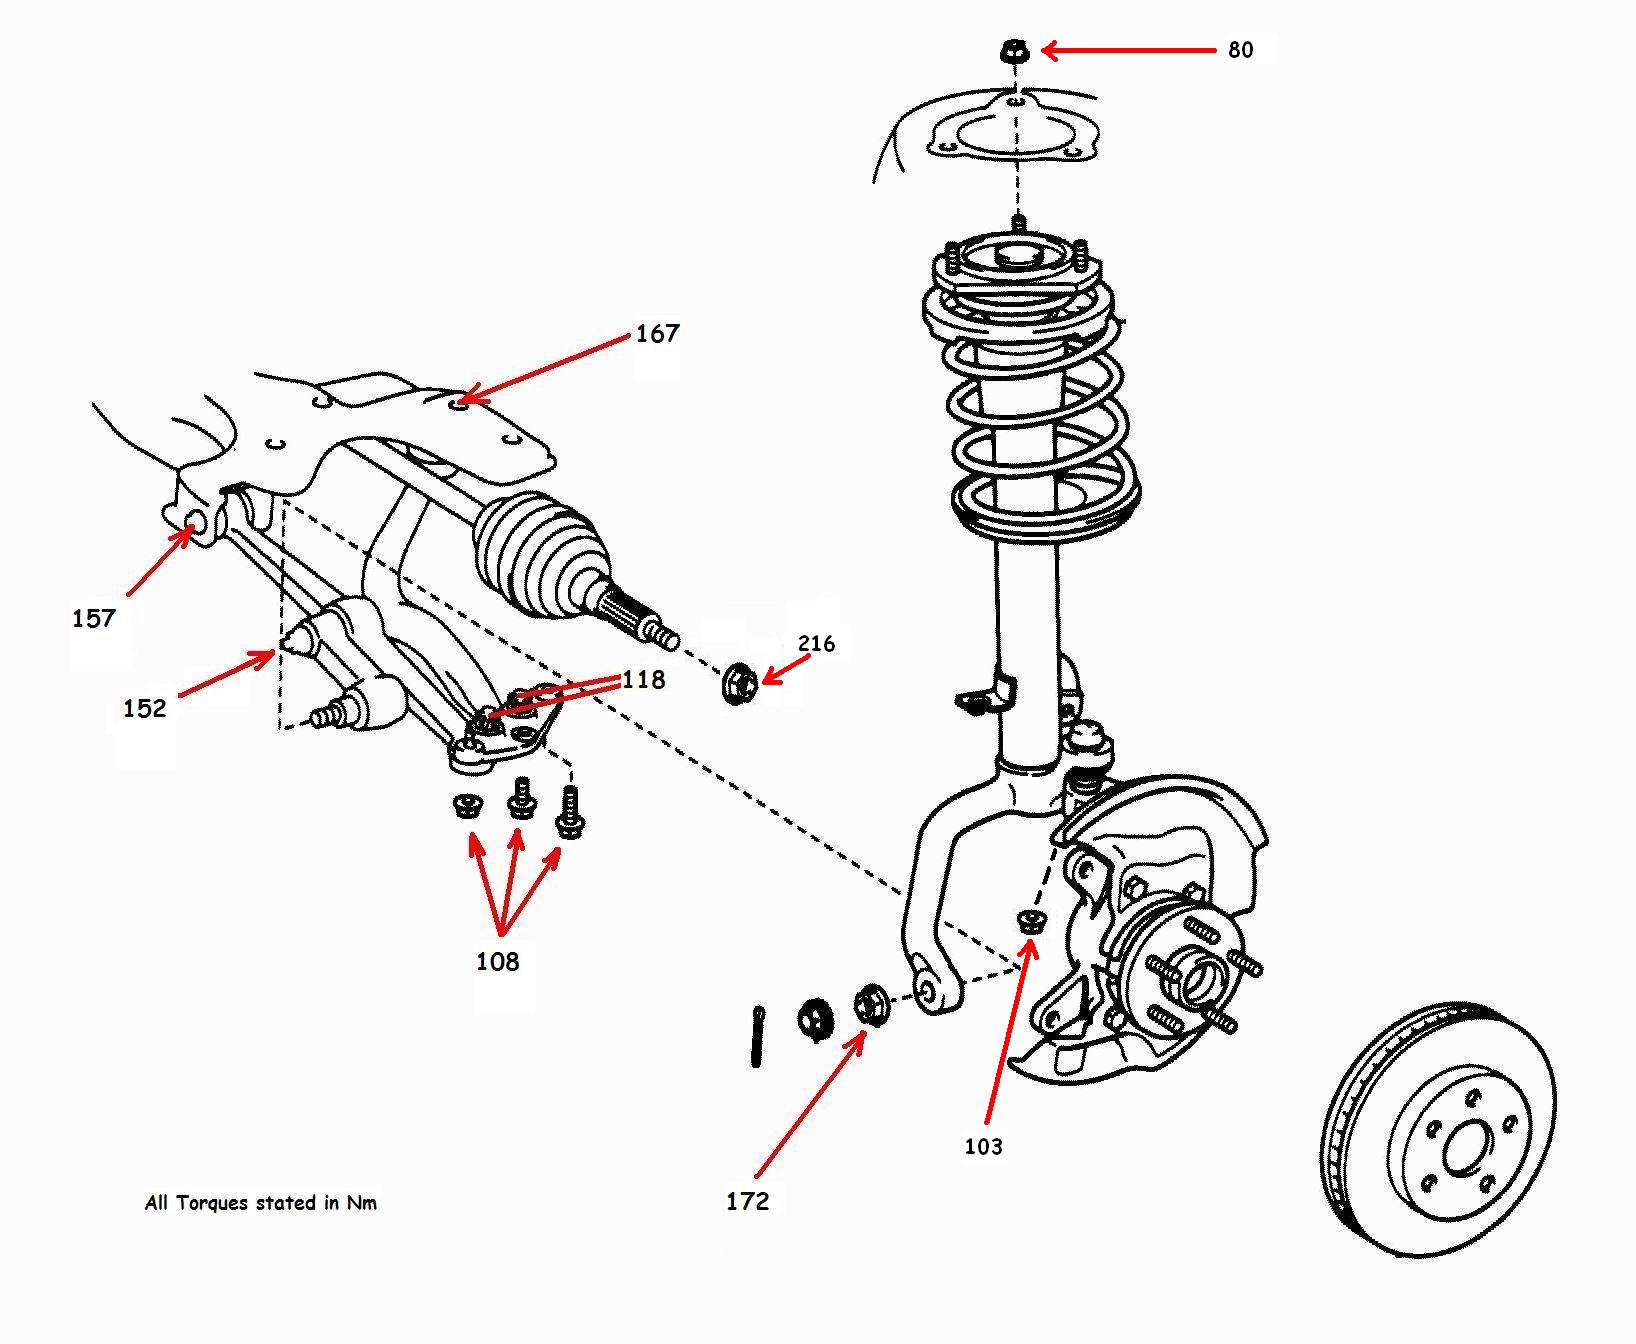 |
| Super Strut torque settings |
Tools
 |
Jack up car, remove the wheel. Loosen each corner of the left and right hand side engine under trays where they attach by the Camber control arm |
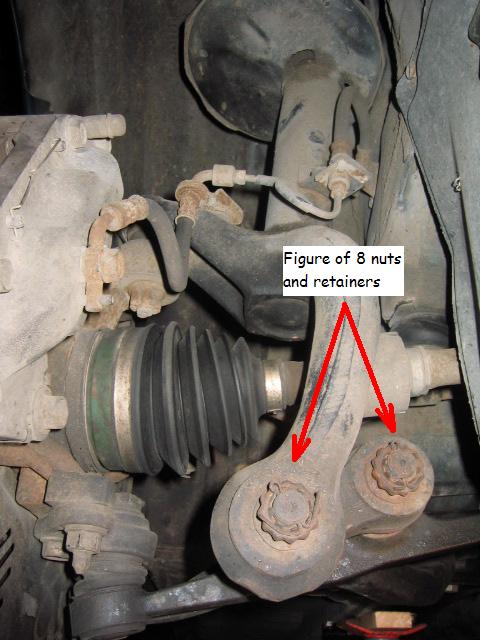 |
Locate the figure of 8... |
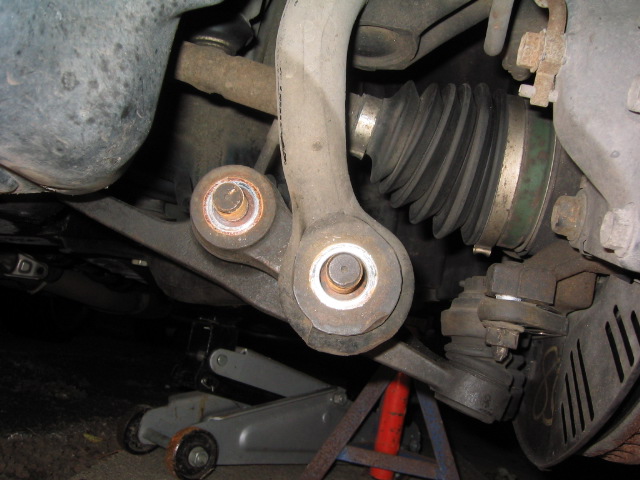 |
...and remove the 2 split pins and 2 retaining caps. Undo and remove the 2 x 22mm nuts |
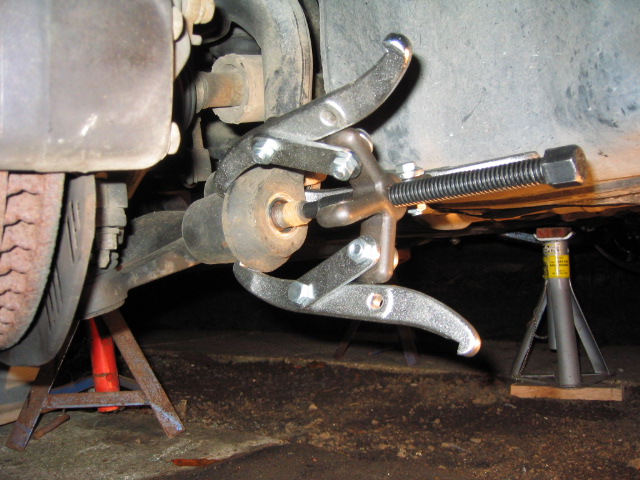 |
Attach the 3 leg bearing puller to the figure of 8 where it joins the bottom of the shock absorber, and tighten - lots |
 |
Heat the figure of 8 and then strike the back of the shock to push this off the figure of 8 - this may or may not be necessary depending on how badly stuck the figure of 8 is. If it doesn't come off then tighten further, heat more and hit harder until it does come off! |
 |
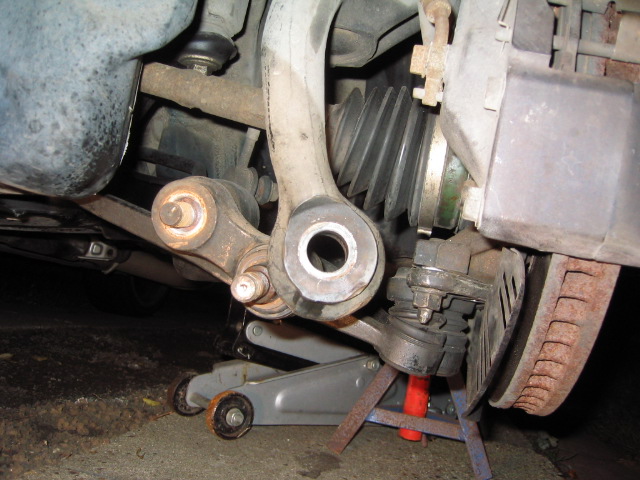
On the bottom of the hub is a plate onto which the camber control arm and banana bar attach... |
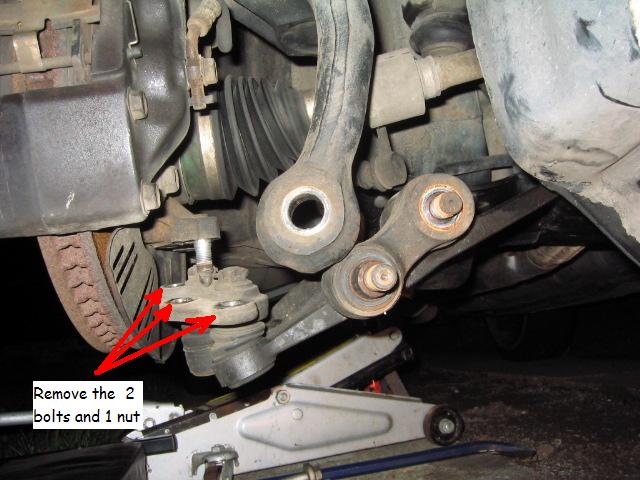 |
...the plate is attached to the hub by 2 bolts and a nut, loosen and remove these. Push the plate down and off the locating pin and you will be able to swing the bottom of the shock away and off from the figure of 8 |
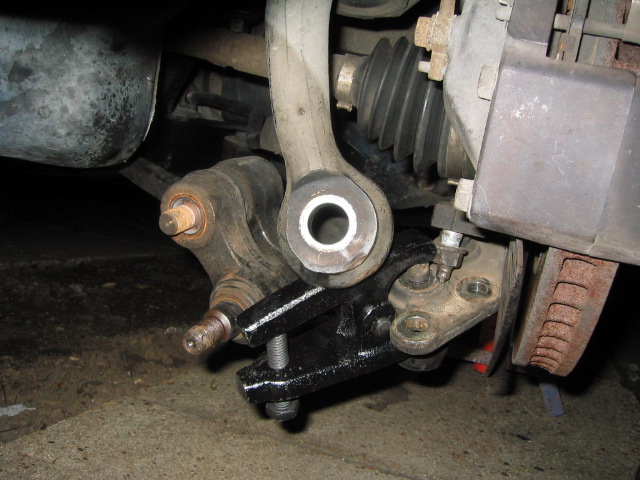 |
I highly recommend NOT trying to split the ball joints from the plate - they are commonly held very tightly in place. I removed the entire assembly and pressed these out. 1 of the joints took just over 2 tons to press out! You may be lucky in removing these with a ball joint splitter as shown but I doubt it! Even with the entire suspension setup removed and working in a vice some of these wouldn't budge! I'd plan on using a press from the outset... |
 |
Undo and remove the bolt securing the inboard end of the camber control arm. On the drivers side this will foul the sump... |
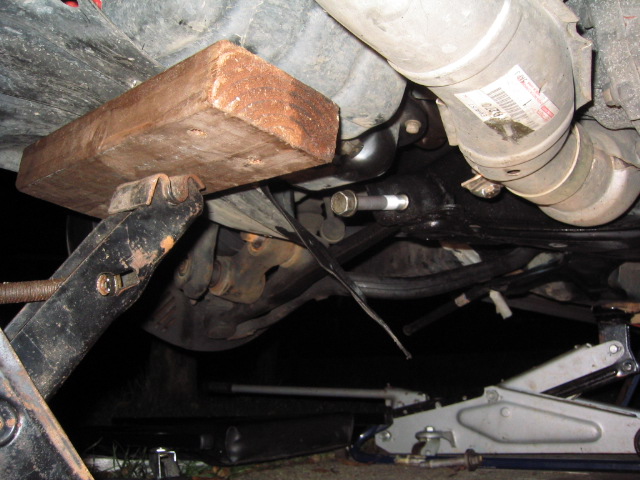 |
...place a decent lump of wood under and across the sump and lift this up with a jack. This will push the engine up on its mounts and gain that extra little bit needed to remove the bolt. Careful not to go mad with lifting up the sump or you may crack the sump |
| Push down on the plate under the hub and release this and push this up to try and make the banana bar level as this will help in a moment | |
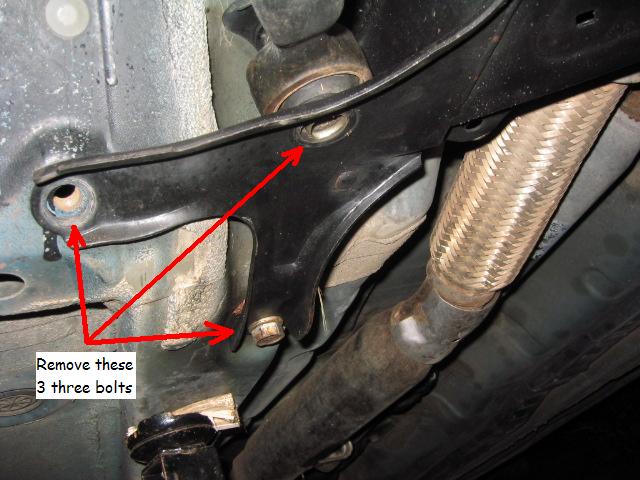 |
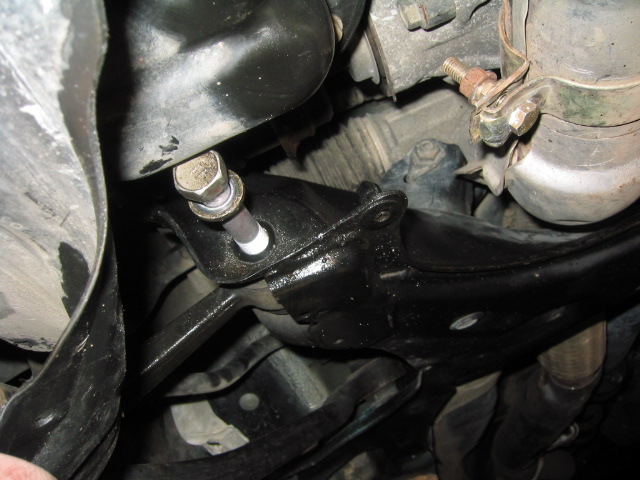
Undo and remove the 3 bolts, (1 long and 2 short), bolts that secure the rear of the sub frame to the chassis |
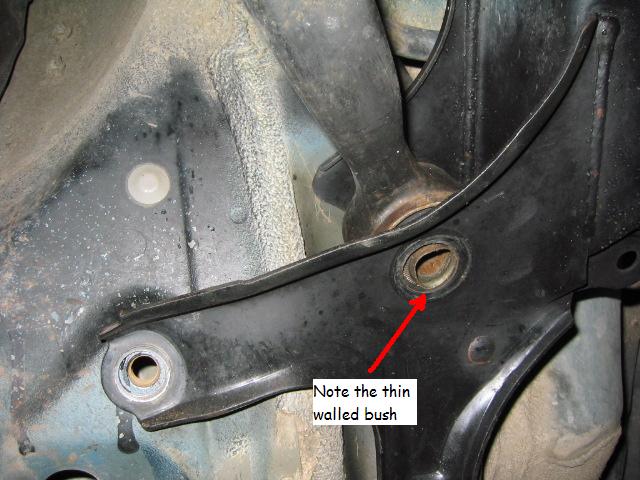 |
Note the presence of a bush. This will prevent you from pulling out the arm... |
 |
...the bush sits inside the banana bar... |
 |
...and it is wider one end that the other |
 |
To remove the banana bar, lever down the sub frame and insert "something" to keep this under tension and away from the chassis - I used a cold chisel |
 |
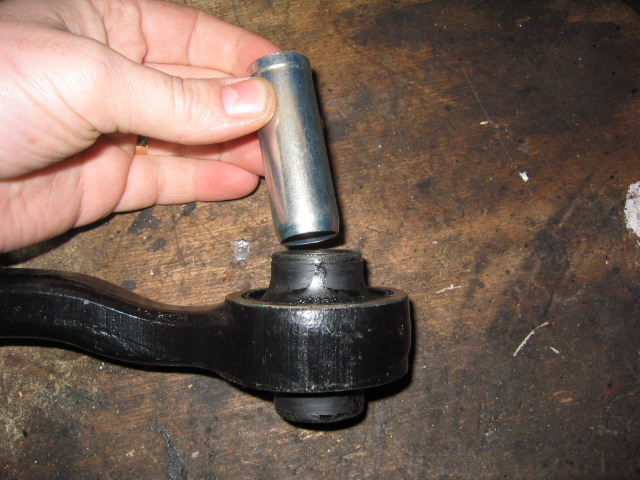
If you look closely at the banana bar securing arrangement you can see the metallic bush that runs through the rubber bush and into the chassis. Using a screwdriver push the bush up as far as it will go to create a little space below the rubber bush... |
 |
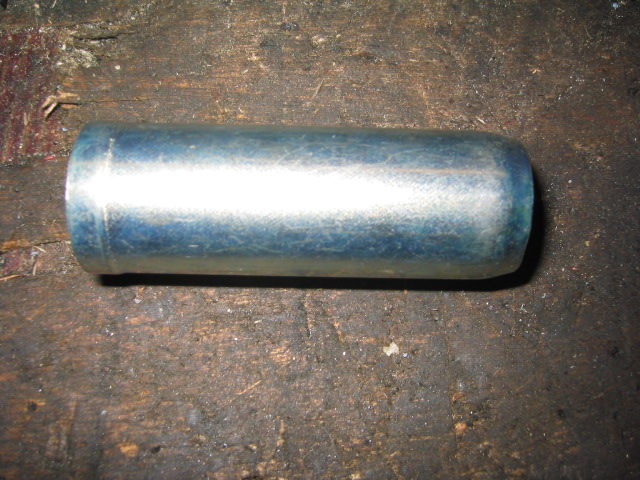
...using a hacksaw cut through the metallic bush...then push the rubber bush down and cut through the top of the metal bush. This particular hacksaw is available through Machine Mart for ~£6 |
 |
With a bit of wiggling the banana bar will come out, leaving only the camber control arm to remove from the body. |
 |
The space left without the banana bar |
| Lever out the lower arm from the chassis and the whole assembly will come free and drop on the floor. I found this easy on one side and a real pain on the other; levering out with a crowbar may help. | |
| Refitting is simply a reversal of removal. Note when inserting the bushes for the banana bar, the tapered section is inserted first... | |
| When refitting the ball joints to the plate I found it easier to install the banana bar to the plate in the vice, torque up and insert split pin, and then install in the car, and then install the camber arm, torque up and insert split pin - but the choice is yours! |
Any questions or comments then please feel free to e-mail me
Other jobs to do at the same time?
Safety