 |
| 165/185/205 torque specifications |
* This article has pictures from the 205, however the procedure is much the same for the 165 and 185 *
Why replace the rear diff bush?
It seems that it gives up the ghost at around 60k miles - moans, groans and clonks from the rear of the car emanate when pulling away, and especially on gear changes, normally when accelerating hard.
Things you should know before
Torque specifications
165 and 185 torque settings in brackets - all stated in Nm.
|
| 165/185/205 torque specifications |
Tools
 |
There are 14 bolts to undo - no more, no less! 4 - diff bush to rear sub assembly |
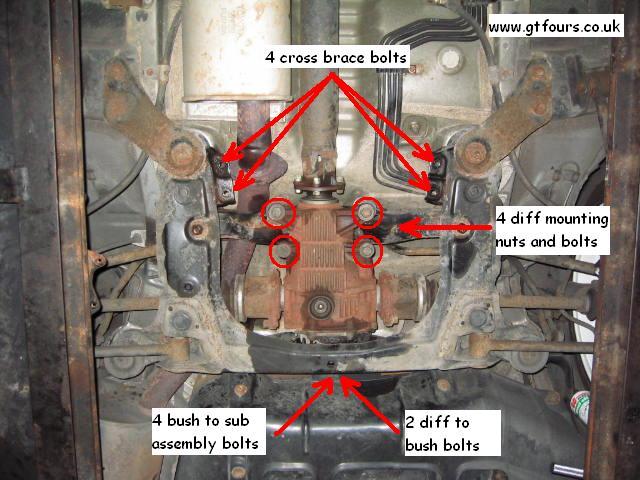
| Firstly undo the 4 cross brace bolts. Undo these until they begin to get tight and then do them back up again to work the crap off/out of the threads. Watch out with these, I removed these on the 165 and very very easily sheared off 2 bolts - use plenty of penetrating oil! | |
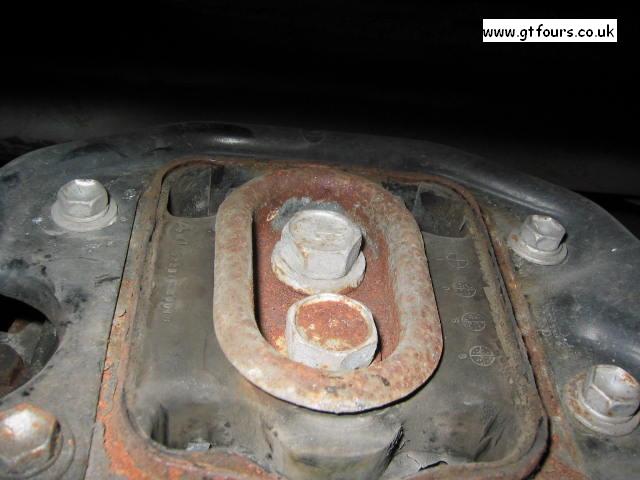 |
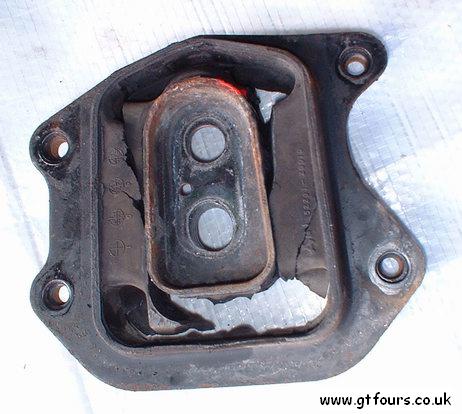
This clearly shows the 4 bush to rear sub assembly bolts, undo and remove these. Also undo and remove the 2 larger bush to diff bolts |
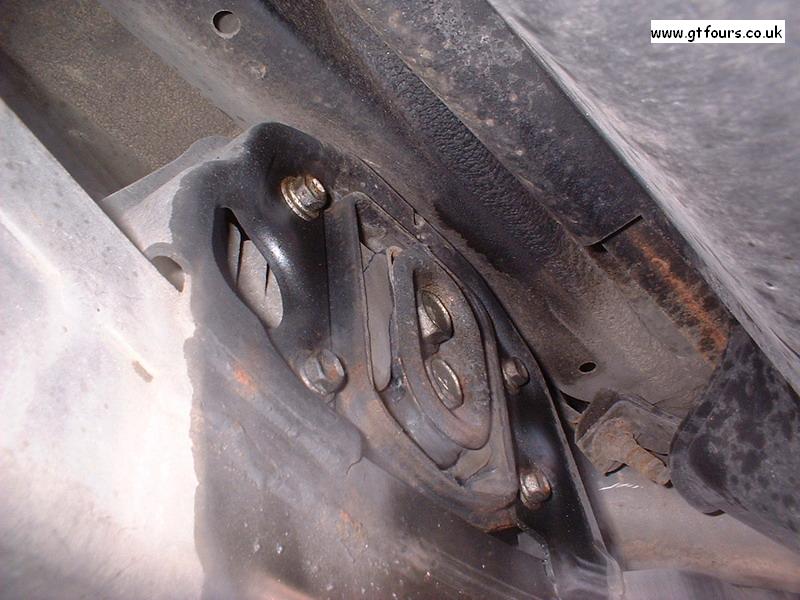 |
Another view of the bush, showing its mounting position |
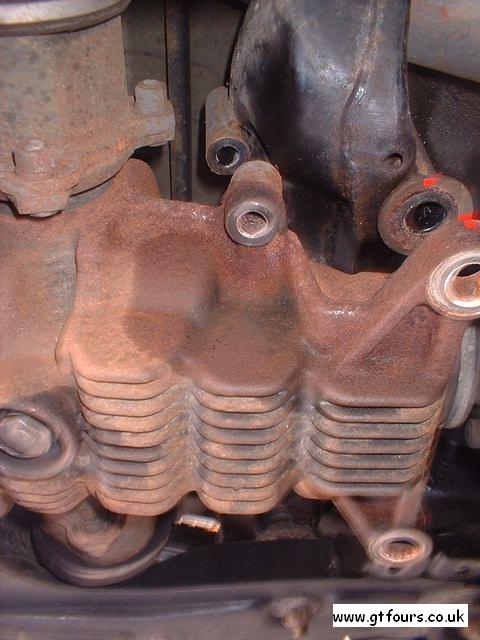 |
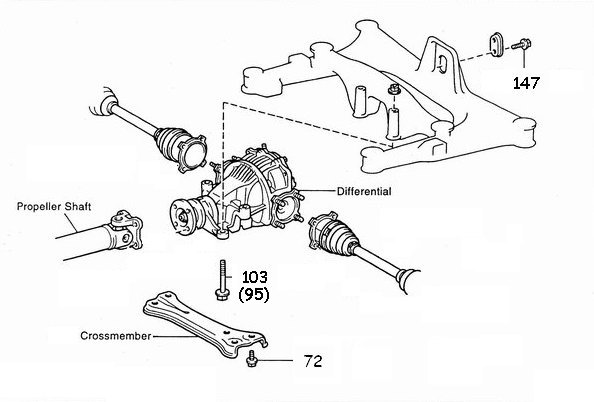
Undo and remove the 4 diff securing nuts and bolts, this will allow the diff to move slightly forwards and down. Note - mark the position of the front of the diff in relation to the diff carrier very carefully with Tippex or similar - markings shown in red here. The mounting holes are considerably larger than the bolts used, so careful correct realignment is a must, or you may prematurely wear a component or get vibrations... |
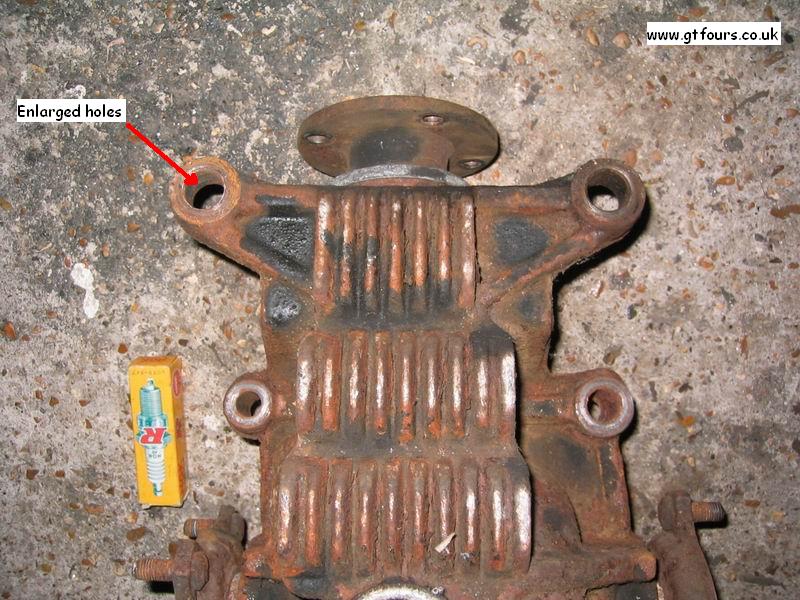 |
This picture shows a 165 diff that is similar in shape to the 205 diff. Note that the front 2 securing holes are larger than the securing bolts, presumably to aid alignment between the diff and the propshaft |
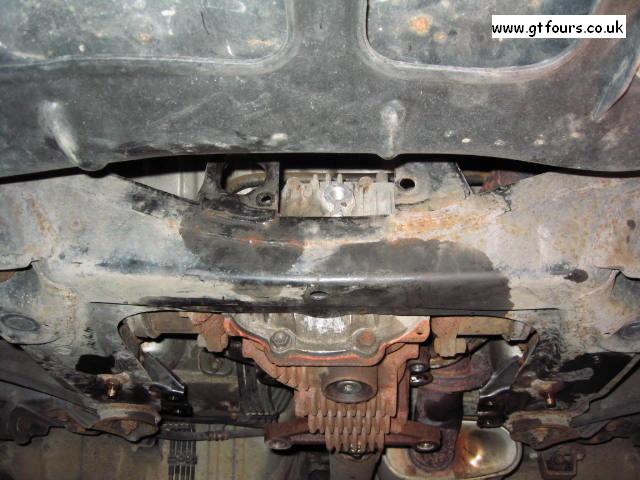 |
Once the securing bolts are undone then the diff drops down. Lower this carefully to avoid damaging your CV joint gaiters. Note that the bush has already been removed in this picture |
| Once lowered then it's simply a case of inserting your crowbar between the end of the diff and rear sub assembly and gently levering the diff forwards and 'slightly' upwards. This will enable your partner to 'simply' slide out the bush from the left hand side, (when looking from the rear) - thanks Mark! Note - it takes a little bit of fiddling about to find the correct position in order to slide the bush out, but it does come out! | |
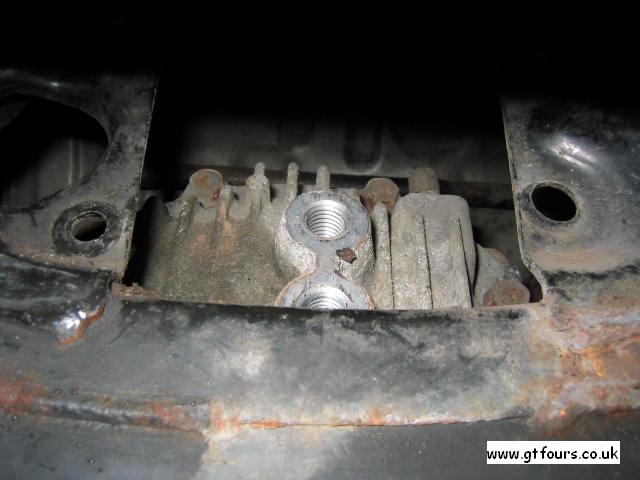 |
The end of the diff, with the bush removed. |
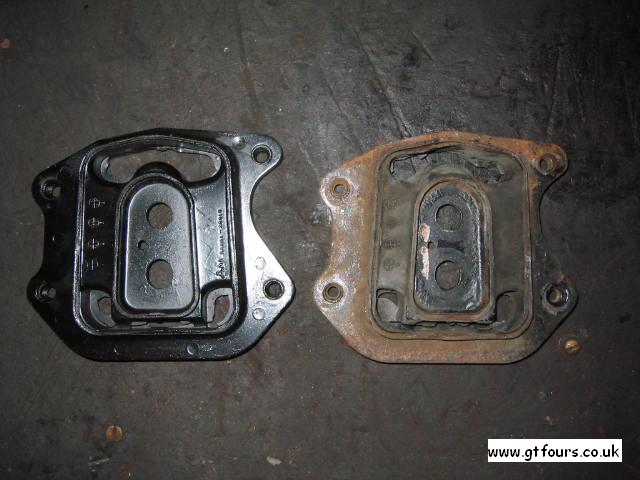 |
One side of the old/new bushes. Note the central locating section...that's why it's a git to get off! |
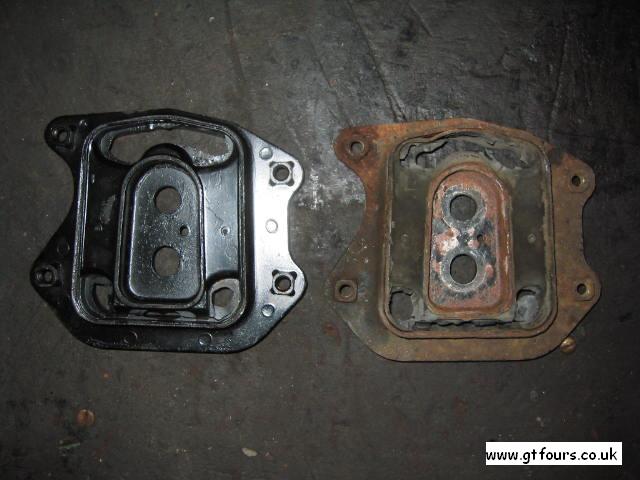 |
The other side of the bush. This bush wasn't particularly knackered when inspected, however it still gave me moans, groans and clonks! |
  |
A well and truly knackered bush! |
| Simply insert your new bush, flat side up and torque up all the nuts and bolts...remembering to carefully realign the front diff mounting bolts. If you are attempting this with the car on axle stands you may need a trolley jack to lift the diff back up into position. |
Any questions or comments then please feel free to e-mail me
Other jobs to do at the same time?
Anything else?
You may consider repairing the diff mount, have a look here at an interesting article by Scott.
Safety